WordPress Tutorial – How To Install WordPress On BlueHost Web Hosting

WordPress Tutorial – How To Install WordPress On BlueHost Web Hosting


More free tutorials:

Installing WordPress on BlueHost hosting is quick and easy. Watch this tutorial, and you can do it in under four minutes!

Mark McLaren of McBuzz Communications shows you how to build your own self-hosted WordPress website or blog with BlueHost hosting.

5 Comments

PSD To WordPress Tutorial #4 – Main Content HTML

PSD To WordPress Tutorial #4 – Main Content HTML


Hey gang, in this PSD to WordPress tutorial, I’ll be creating the main content HTML to finish of our HTML template. In the next lesson, we’ll dive into the CSS!

SUBSCRIBE TO CHANNEL –

========== JavaScript for Beginners Playlist ==========

========== CSS for Beginners Playlist ==========

========== HTML for Beginners Playlist ==========

========== The Net Ninja ============

For more front-end development tutorials & to black-belt your coding skills, head over to – or

========== Social Links ==========

Twitter – @TheNetNinja –

7 Comments

Webdesign Mit WordPress Tutorial Teil 3 – Theme Bearbeiten Und Header/Logo-Design

Webdesign Mit WordPress Tutorial Teil 3 – Theme Bearbeiten Und Header/Logo-Design


Hallo Leute

heute gibts das dritte WordPress Tutorial.
Thema: Bearbeiten des Themes sowie das erstellen eines eigenen Headers mit Logo in Adobe Photoshop

Theme-Dowload:
Blog:

6 Comments

WordPress Tutorial | Adding Posts To A Page And Adding Links (Blogroll)

WordPress Tutorial | Adding Posts To A Page And Adding Links (Blogroll)


Here’s a quick video going over some WordPress basics: adding a post to a category and then adding a link (formerly known as blogroll). In this video, we’re looking at a site that has mostly pages as the navigation structure but within those pages are custom templates that list posts from a certain category. A nice way to (1) keep things simple on your site navigation-wise, but also (2) add new posts–and thereby new content–to your site rather than just adding a list to a long page (bad idea for search engine optimization).

14 Comments

All In One SEO Pack Plugin For WordPress – Tutorial

All In One SEO Pack Plugin For WordPress – Tutorial


– Get the robust premium version of this plugin!
– Get the free version (the version in this video)

In this video I explain what the All In One SEO Pack Plugin is and how to install it on your wordpress website.

13 Comments

How To Create An Ecommerce Store: WordPress Woocommerce Tutorial

How To Create An Ecommerce Store: WordPress Woocommerce Tutorial


How to Create an Ecommerce Store with our WordPress Woocommerce Tutorial. Get iPage .99 hosting:

Discover how to make 10k/month with dropshipping:

(please note – the iPage link is an affiliate link)

UNFORTUNATELY MYSTILE IS NO LONGER SUPPORTED. I have uploaded it here:

Here is the updated Mystile theme, Storefront:

Find products to dropship for your store:

(Please note: I deactivated the store – I only created it as an example)

In this Woocommerce tutorial, we teach you how to create a ecommerce store. Using WordPress, it is very easy to create an ecommerce store. Even if you’ve never made a website before, you’ll be able to set up your own simple store.

Go to Fiverr here:

Step 1: Get iPage .99/month hosting + domain name

To create an ecommerce store, you are going to need website hosting and a domain name. We strongly recommend iPage because it is very cheap (.99/month) and you get a free domain name with your purchase.

To get it, simply click on this link:

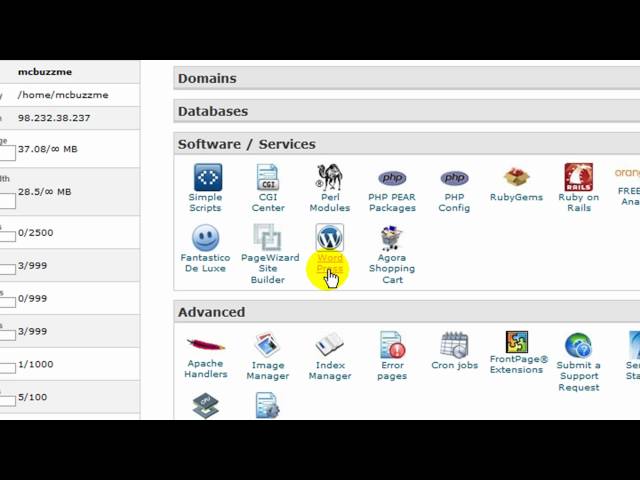
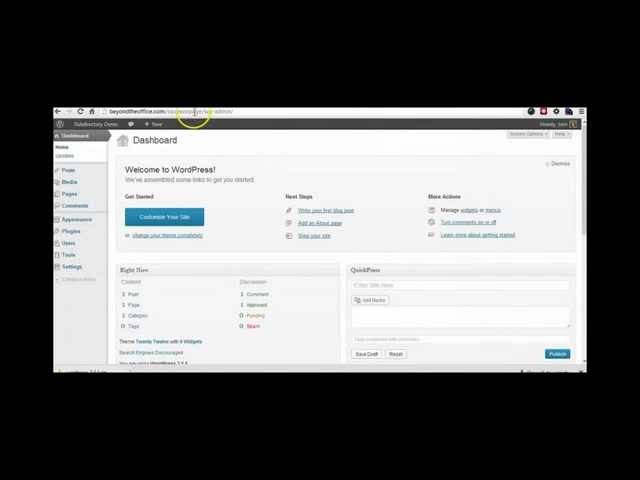
At the end of the setup you’re going to be in the control panel: Stay there for step 2.

Step 2: Install WordPress & Woocommerce

In the control panel click on the WordPress button. Follow the instructions to install WordPress. For more details, watch our video on how to create an ecommerce store. When you’re done, you’ll be able to login to your WordPress admin account – do this.

Next, to create an ecommerce store you’ll need to install the Woocommerce plugin. You do a search for Woocommerce in the plugin search bar to find it, no need to download it. Be sure to activate it.

Step 3: Install the Woocommerce theme Mystile

Next, we are going to install the Woocommerce custom theme, Mystile. It is absolutely free. You can download it here:

Even though it says it it is a “product” it isn’t. It is free. Click add to cart and then create a free account to access it and download it. Return to your WordPress admin and go to the themes section of your account (for more information, be sure to watch our video on how to create an online store).

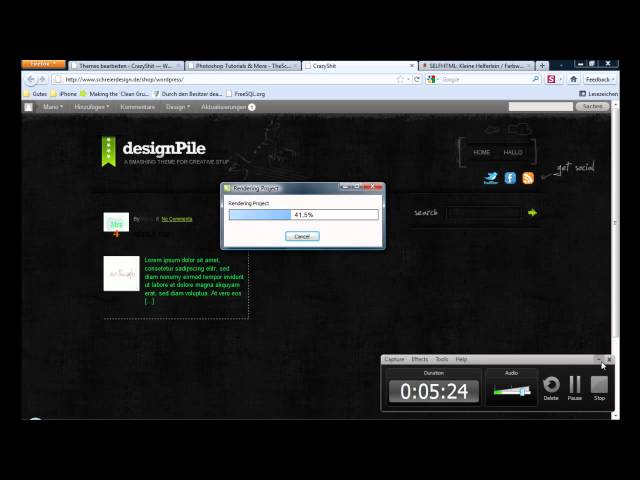
Step 4: Customize your ecommerce store

The first thing you want to customize when you create an ecommerce store is your shipping and payment options. We’re going to set it up so that we can accept payments with PayPal, which means we can start getting paid straight away!

Head to the settings and click on the setup button. Follow the instructions. You’ll need to select what type of payments you’ll accept and you’ll need to select what countries you’re accepting shipping from.

The next thing you’ll want to do when you create an ecommerce store is add the items that you’re going to sell. To start, create categories to organize the different types of items you are selling. After that, click “add product.”

From here you can add two major types of products: Simple and variations. A simple product is a product that doesn’t have variations (for example, a mug that only comes in one colour) whereas a product with variations has multiple options for the same product (e.g. a mug that comes in multiple colours).

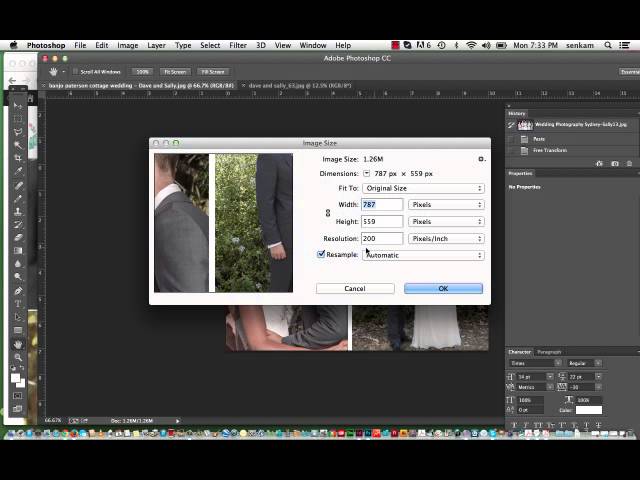
For all products, add in a title and a description. If you want your product description to be SEO friendly, ensure it is at least 400+ words long. Add in a picture gallery with your photos, and add a feature image to appear as your listing thumbnail picture.

If you select to add a simple product, you’ll only have to put in one pricing option and one shipping option.

If you select to add a product with variations, you’re going to need to add in the pricing and shipping options for each variation.

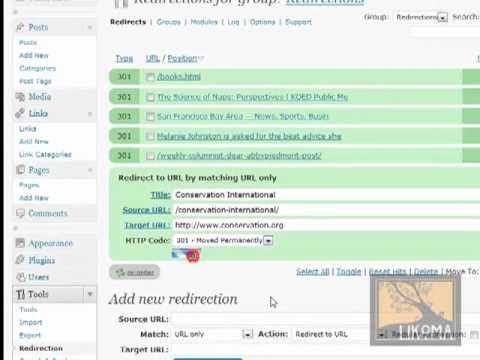
Next, you’ll want to create your homepage. Create a page. Name it “home.” Keep it blank for now. Next, go to your settings and select reading. Pick “home” to be the static page on your frontpage of your website. Next, go back to your page “home” and edit it.

I recommend deleting the title “home,” adding in a custom banner, putting some text on the homepage (to make it SEO friendly) and to have a preview of your last added products. To do that, simply add this piece of code:

I also recommend customizing the following:

Add a custom logo (necessary)
Add a custom menu (necessary)
Add an about us page (optional)
Update the footer (optional)

This is a beginner tutorial on how to create an ecommerce store with Woocommerce – customize it more and turn it into a digital asset!

To get started, sign up for an iPage hosting plan now:

Please note, this contains affiliate links.

35 Comments

WordPress Tutorial Video For ‘The 7’ WordPress Theme

WordPress Tutorial Video For ‘The 7’ WordPress Theme

This wordpress tutorial video has been created to show you how to edit your photos, upload them to the websites portfolio page and name them correctly. WordPress Tutorial Video – The 7 Theme

5 Comments

How To Install WordPress In A Subdirectory

How To Install WordPress In A Subdirectory


This quick video will show you how to install WordPress in a subdirectory using a standard cPanel web hosting interface. There are many reasons why you might want to install WordPress in a subdirectory, such as to have a secondary WordPress site to use for an event or with a theme like OptimizePress to manage your squeeze and sales pages.

Check out thewptoolbox.com for more WordPress tutorials!

20 Comments

WordPress Tutorials In Hindi / Urdu – 7 – How To Create Menu In WordPress

WordPress Tutorials In Hindi / Urdu – 7 – How To Create Menu In WordPress


For all my tutorials go to:

In this tutorial I will teach you about how to create menus in wordpress

15 Comments

How To Make A PREMIUM Website With WordPress – Complete Tutorial

How To Make A PREMIUM Website With WordPress – Complete Tutorial


(My Affiliate Link to Purchase the Divi theme)

In this comprehensive tutorial, I show you how to create a state-of-the art website with WordPress. WordPress is a content management system used by many prominent brands and blogs. I also use the Premium Divi theme from Elegant Themes to create the website used in this tutorial and I think you’ll find the Divi theme just as amazing as I do. You’ll have the ability to add all types of content and customize virtually every component of your WordPress website.

***Please help support me by liking the video and subscribing to my channel. Thank you so much for the support you’ve given me thus far!

Affiliate Links (You can support me by using these links to purchase the Divi theme and a Hosting Account):

Purchase the Divi theme:
Purchase Hosting:
HostGator Coupon Codes:
wpsculptor1cent (Get your first month of hosting for 1 cent.)
wpsculptor30 (Get up to 50% off your hosting order! *Best Value)

CSS Code used in the video:
min-height: 720px;
text-shadow: 1px 1px #000000;
min-height: 240px;
#footer-info {display: none;}

Video Table of Contents (Click on the time codes to be taken to that part in the video)

0:00:00 Introduction
0:00:08 Tutorial Overview – (Website Walkthrough)
0:04:04 Setting up a domain name and hosting account
– My HostGator affiliate:
-Coupon Codes:
wpsculptor1cent (Get your first month of hosting for 1 cent.)
wpsculptor30 (Get up to 50% off your hosting order! *Best Value)
*Thanks in advance!

0:11:19 Installing WordPress onto your hosting account
0:15:20 Logging in to the backend of your WordPress website
0:16:13 WordPress Basics (Deactivate coming soon page, change password, using the admin bar)
0:19:27 Installing the Divi theme
-Please Purchase the Divi theme through my Affiliate Link:
*YOU ARE AWESOME 🙂

0:25:23 Accessing additional Divi video tutorials
0:26:08 Creating Pages
0:28:41 Choosing which page you want to be your home page
0:30:10 Setting up the Main Navigation Menu
0:34:46 Setting up a Top Bar Navigation Menu (above the header)
0:35:36 Choosing a Professional Color Scheme
0:41:19 Applying your Custom Color Scheme to your website
0:44:15 Changing the Site Title and Tagline
0:45:24 Setting up an Optional Boxed Layout
0:47:11 Setting up the Header
1:02:52 Creating a Custom Logo (If you already have a logo, feel free to skip ahead to the next step)
1:11:07 Adding your Logo to your website
1:12:06 Creating a “Favicon” (This is the tiny icon that shows up for different websites on browser tabs)
1:15:39 Adding Content to the About Us Page
1:20:46 How to get Free High Quality Stock Photos
1:29:44 Changing your website Font settings and choosing a Custom Font
1:32:21 Customizing the About Page page title
1:34:04 Setting up the Media Page
*Tip: To add, remove, or rearrange images in your gallery, just click on the gallery module settings button and click on “Update Gallery”

1:39:45 How to Rearrange your Modules
1:40:18 Setting up the Frequently Asked Questions Page
1:44:12 Setting up the Contact Us Page
1:50:38 Setting up the Our Packages Page
2:11:29 Setting up the Schedule a Free Lesson Page
2:17:21 Setting up the Home Page (The Nitty-Gritty)
2:17:56 Setting up the Top Section
CSS Code used: min-height: 720px;

2:36:06 Adding a Video Background to the Top Section
2:44:42 Adding a Text Shadow to the Slogan to make it stand out more
CSS Code used: text-shadow: 1px 1px #000000;

2:46:33 Creating a New Section with Custom Blurb Modules
2:54:21 Creating a New Section with a Custom Background Color and a Call to Action
2:58:00 How to Rearrange different Sections
2:59:04 Adding a New Section with multiple Modules
3:12:09 Using Section Background Images with the Parallax Effect
3:16:35 Setting up the Testimonial section
3:30:23 Making your Testimonial Modules the same height
CSS Code used: min-height: 240px;

3:32:20 How to Save Custom Layouts and Apply them to Other Pages
3:38:24 How to Update the Divi Theme to the Latest Version
3:41:04 Setting Up the Footer Area
3:47:13 Removing the Divi and WordPress Attributions in the Footer –
CSS Code used: #footer-info {display: none;}

3:48:39 Setting up the Optional Social Media Links in the Footer and Customizing the Bottom Bar
3:51:09 How to Make Site Headings Bold
3:52:10 Text Title Adjustment for a Mobile Friendly Site
3:54:29 How You Can Show Your Support

28 Comments