WordPress Tutorials – How To Change Your Permalinks Structure
WordPress Tutorials – How To Change Your Permalinks Structure
Get 30 FREE WP Tutorials:
“WordPress Tutorials” “How To Change Your Permalinks Structure”
One very simple, but very effective way to simplify your blogs’ URL and make it user and search-engine friendly is often over-looked. By changing the Permalink Structure on your blog it will make it easier for your readers to know where they are on your site, but can also help greatly with your SEO efforts.
For New Installations
If you have a new installation of WordPress or are planning your next installation follow these simple steps to changing your Permalink structure:
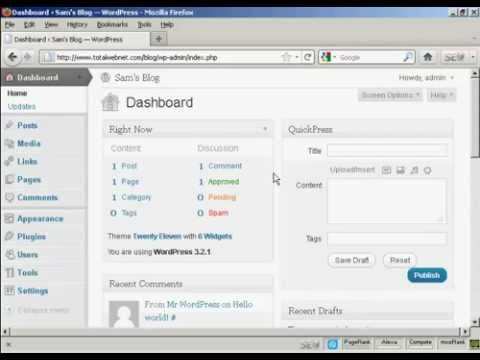
Once you have installed WordPress login and you should arrive at the Dashboard.
On the left hand side of the Dashboard you will see a list of menu tabs. When you hover your mouse over the different menus, an arrow appears at the end. Hover over the Settings Menu and click on the arrow. A drop down menu should now appear.
Click on the ‘Permalinks’ link. You should now be at the ‘Permalinks Settings’ page.
You will now see that you have 5 options and on a new installation of WordPress it will be set to the Default option. As you can see from the example it gives, for each post you make it assigns a page number which isn’t really ideal. You now need to click the ‘Custom Structure’ option and enter the following text into the box along side:
/%category%/%postname%
Now click the blue box ‘Save Changes’. That’s it – all done, now when you make a post you will see the category name you posted it in and the posts name, which is much more user and search engine friendly.
For Already Installed Blogs – How To Install Plugins
If your blog has been installed sometime and you never changed the Permalinks structure and have made several posts, you will first need to install a plugin called ‘Permalinks Migration Plugin’ before you can change your Permalink structure.
You can download the plugin at Once you have downloaded the plugin and installed it to your plugins folder via your FTP client, login to the Dashboard of your blog.
Once you are logged in to the Dashboard click on the ‘Plugins’ link in the menu down the left hand side. You should now be in the ‘Manage Plugins’ page, scroll down until you find the ‘Dean’s Permalinks Migration’ plugin and click on the ‘Activate’ link. Now that you have activated the plugin, click on the ‘settings’ drop down menu on the left hand side and click the ‘permalinksmigration’ link.
You now need to enter in the box your current Permalink Structure, if you don’t know what this is click on the ‘permalinks’ link under the ‘Settings’ menu on the left hand side and you will see which permalink structure is selected, make a note of this, go back to the Permalinks Migration page and enter it into the box and click the ‘Update options’ button. You can now go back to the ‘Permalinks Structure’ page and change it as I have done above.
All done, as you can see just a few simple steps that will make a big difference to your blog, enjoy:-)
This is fantastic information and thank you. Now this permalinks seems to work great with posts…but my question is…what if it’s a page and not a post? Do pages get the same treatment as the URLs coming in clean the same way the post do?