WordPress Tutorials: How To Add Images To The Body Of Your WordPress Blog Post
WordPress Tutorials: How To Add Images To The Body Of Your WordPress Blog Post
Hello it’s Asher here to give you a WordPress Tutorial about how to add images/ photos to your blog body.
So we come to the dashboard of and go “Add New Media” but before adding new media you have to decide the size you want for your image and shrink it. An easy way to do this is by using
The next step is to choose the file and upload. You are taken to the image library of the wordpress blog back office where all your images are stored. Then you’ll go “Add New Post” – like before you should choose a good title and make sure your keywords are there.
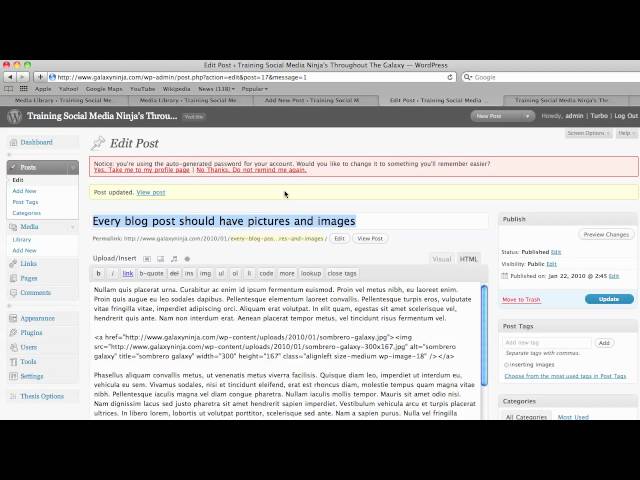
I want to add an image to the body of my blog post so I clicked on the little icon that says “Add an Image.” I click on sombrero galaxy which is the image I want and then we’re presented with a screen that allows us to add alt (alternate) text which is what Google sees and also it gives you the option of image size, image position and if you want a caption for the image you can add it here.
Then hit “Insert into Post” and you’re done – Good Luck!
This video was brought to you by GalaxyNinja.com
Thanx a lot man… 🙂
Asher – a techno-peasant like me understood what you were talking about so you are definitely on the right track!
I appreciate the manor in which you have delivered this tutorial. Thank you much.
I just came across a WP training course that will enable you to transform WordPress into a high quality marketing platform. It is really incredible and must-have course for any marketer in any niche, It is very easy to follow. please visit my channel and watch the sample video I uploaded. just visit: ==> /watch?v=0Fq7N_jJB2M <– or visit my channel
Thanks for this video! It has been really helpful in setting up my WordPress blog.
Hi Asher, I usually resize with Paint.net, which is also fast.